Kubernetes deployment (K8S)
Helm Charts - v0.1.6
Cheminformatics Microservice comes packaged with a Helm chart, that makes it easy to deploy and manage (scale) containers on Kubernetes via a convenient package manager interface.
By following the steps outlined in this documentation, you can easily deploy this microservice using Helm.
For more information about Helm Charts based deployment please refer to official Helm documentation.
Prerequisites:
Before proceeding with the deployment, ensure that you have the following:
Kubernetes cluster: Set up a functioning Kubernetes cluster with kubectl configured to interact with the cluster.
Helm: Install Helm on your local machine or the machine from which you'll be deploying the application.
Deployment using CM Helm Chart
- Add repo: Once Helm has been set up correctly, add the repo as follows:
helm repo add repo-helm-charts https://nfdi4chem.github.io/repo-helm-charts/If you had already added this repo earlier, run helm repo update to retrieve the latest versions of the packages. You can then run helm search repo repo-helm-charts to see the charts.
- Deploy the Chart: To deploy the chart, use the helm install command followed by the chart package name and an optional release name:
helm install myrelease repo-helm-charts/cheminformatics-microserviceThe release name (myrelease in this example) is used to identify the deployment, and it must be unique within the Kubernetes cluster. The above command with deploy the service with the default configuration provided in values.yml file. To overwrite the default configuration please follow this link to learn more.
- Helm will install the chart and deploy the application to your Kubernetes cluster. You can view the deployed resources using kubectl commands:
kubectl get pods
kubectl get services- Upgrading and Managing Deployments: To upgrade an existing deployment, Use the
helm upgradecommand to apply the changes to the existing release e.g.
helm upgrade myrelease repo-helm-charts/cheminformatics-microservice-0.1.6- Uninstalling the Chart: To remove a deployed chart and associated resources, use the helm uninstall command:
helm uninstall myreleaseThis will delete all resources created by the chart, including pods, services, and any other Kubernetes objects.
Google Kubernetes Engine(GKE)
This documentation will guide you through the process of deploying the CM application in Google Kubernetes Engine (GKE) using Helm. Here we provide a step-by-step instructions to help you set up your environment, install Helm, and dpeloy the CM application in the Google Kubernetes Cluster.
Prerequisites
Before you begin, ensure you have the following prerequisites in place:
- Google Cloud Platform (GCP) Account: You need a GCP account to create a GKE cluster and use other GCP services.
- In the Google Cloud console, on the project selector page, select or create a Google Cloud project.
- Enable the Compute Engine, Artifact Registry, and Google Kubernetes Engine APIs.
- Activate Cloud Shell
- Go to Google Cloud Console
- Click on the 'Activate Cloud Shell' button located at the top of the Google Cloud console window.
Step 1: Create a GKE Cluster
A GKE cluster consists of a pool of Compute Engine VM instances running Kubernetes, the open source cluster orchestration system that powers GKE.
- Navigate to Google Kubernetes Engine page in Google Cloud console.
- Click on the Create icon.
- You can choose between
AutopilotorStandardand click onConfigure. But as the maintainence cost for Autopilot is expensive so we go for Standard option in this documentation. Click here to know the difference between Autopilot and Standard. - Provide the suitable name for your cluster and select the region from the dropdown list.
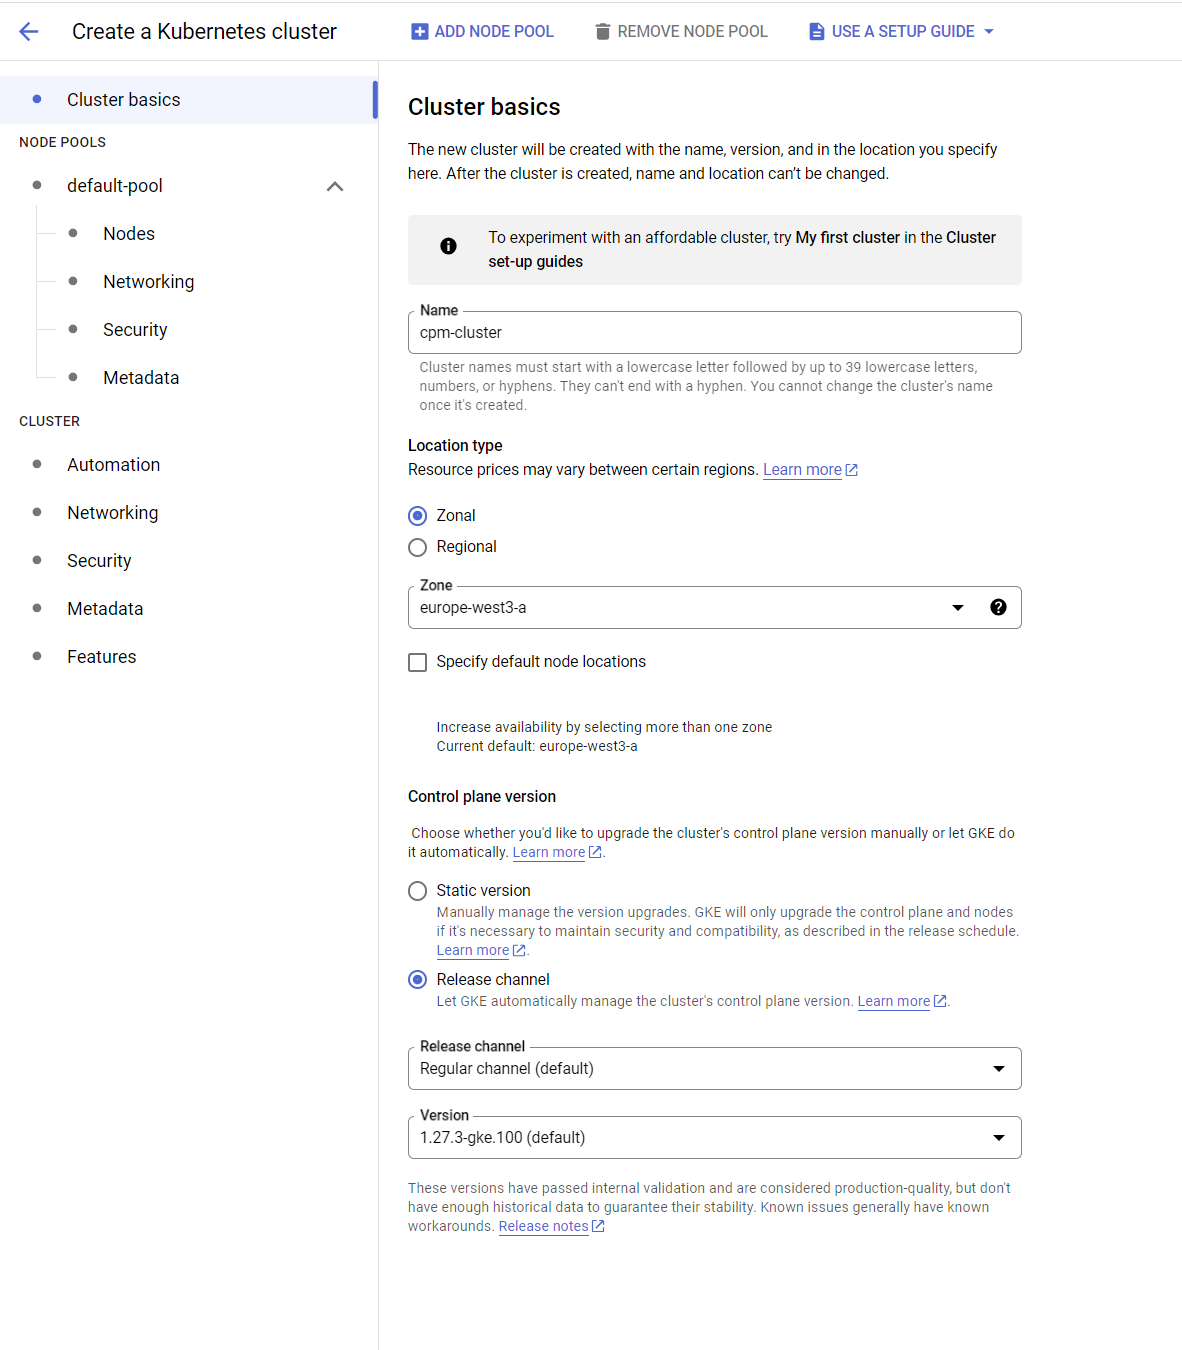
- Click on
Createbutton and wait for the Cluster to be ready.
Step2: Connect to Cluster
- After you cluster is created you can see the green check next to it. Once you see the check, click on the three dots next to your cluster to click on
Connect. - Click on
Run in Cloud Shelloption and press enter.
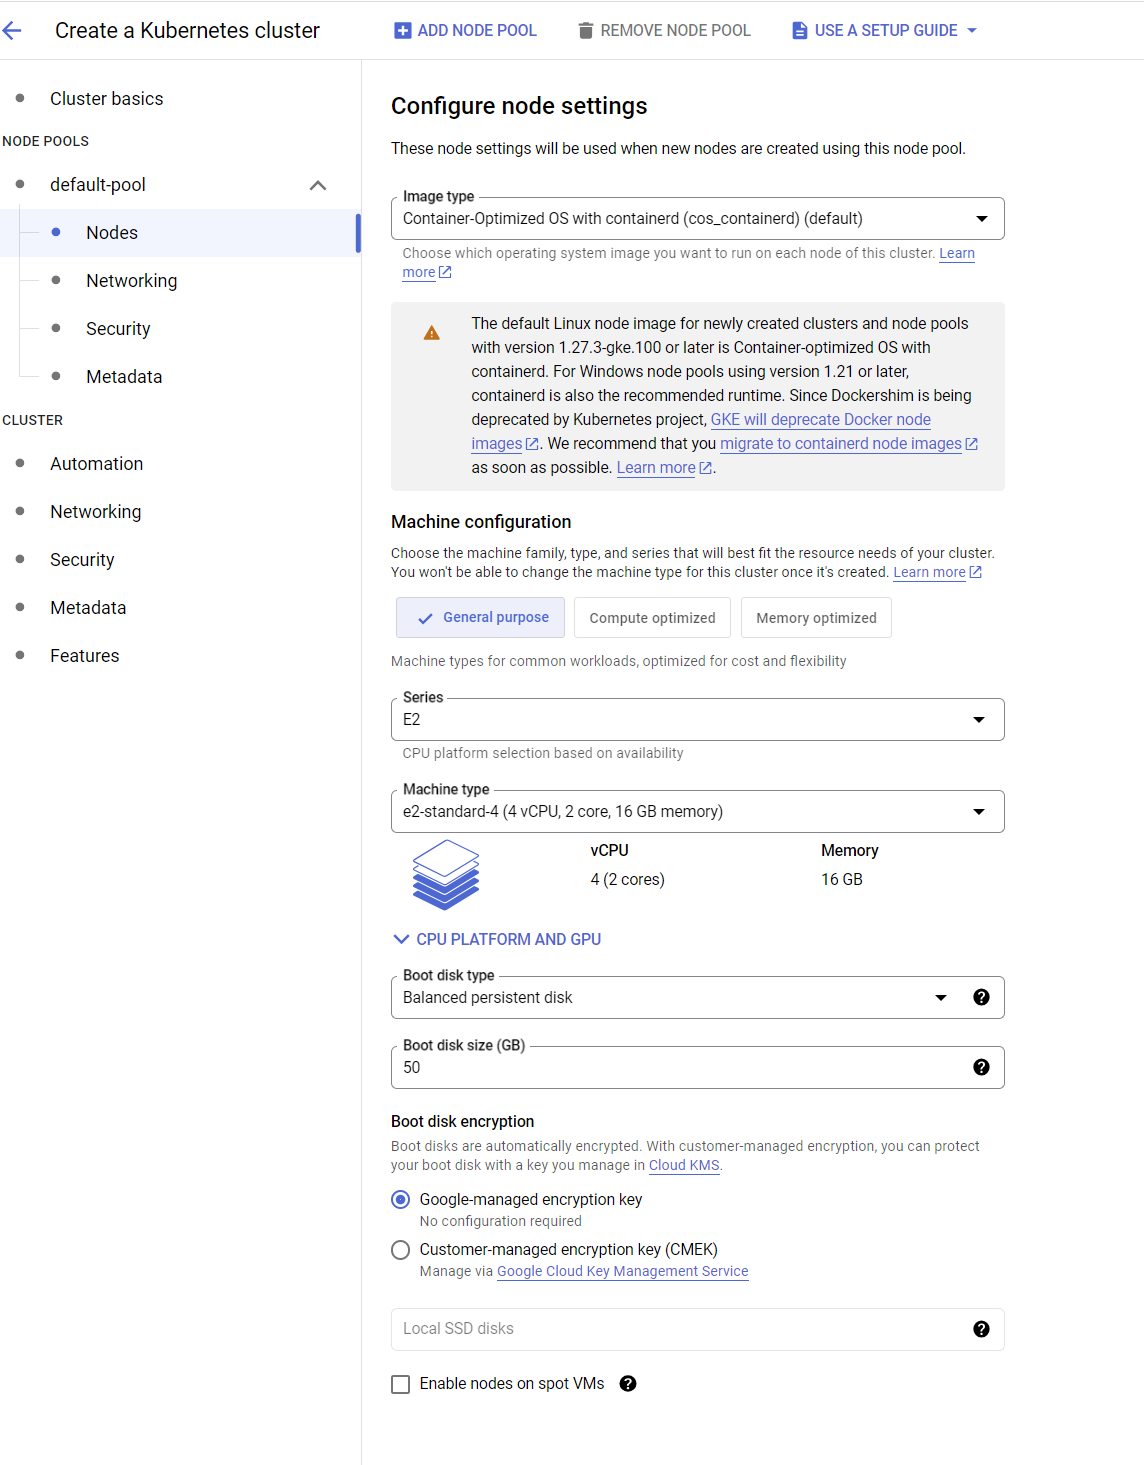
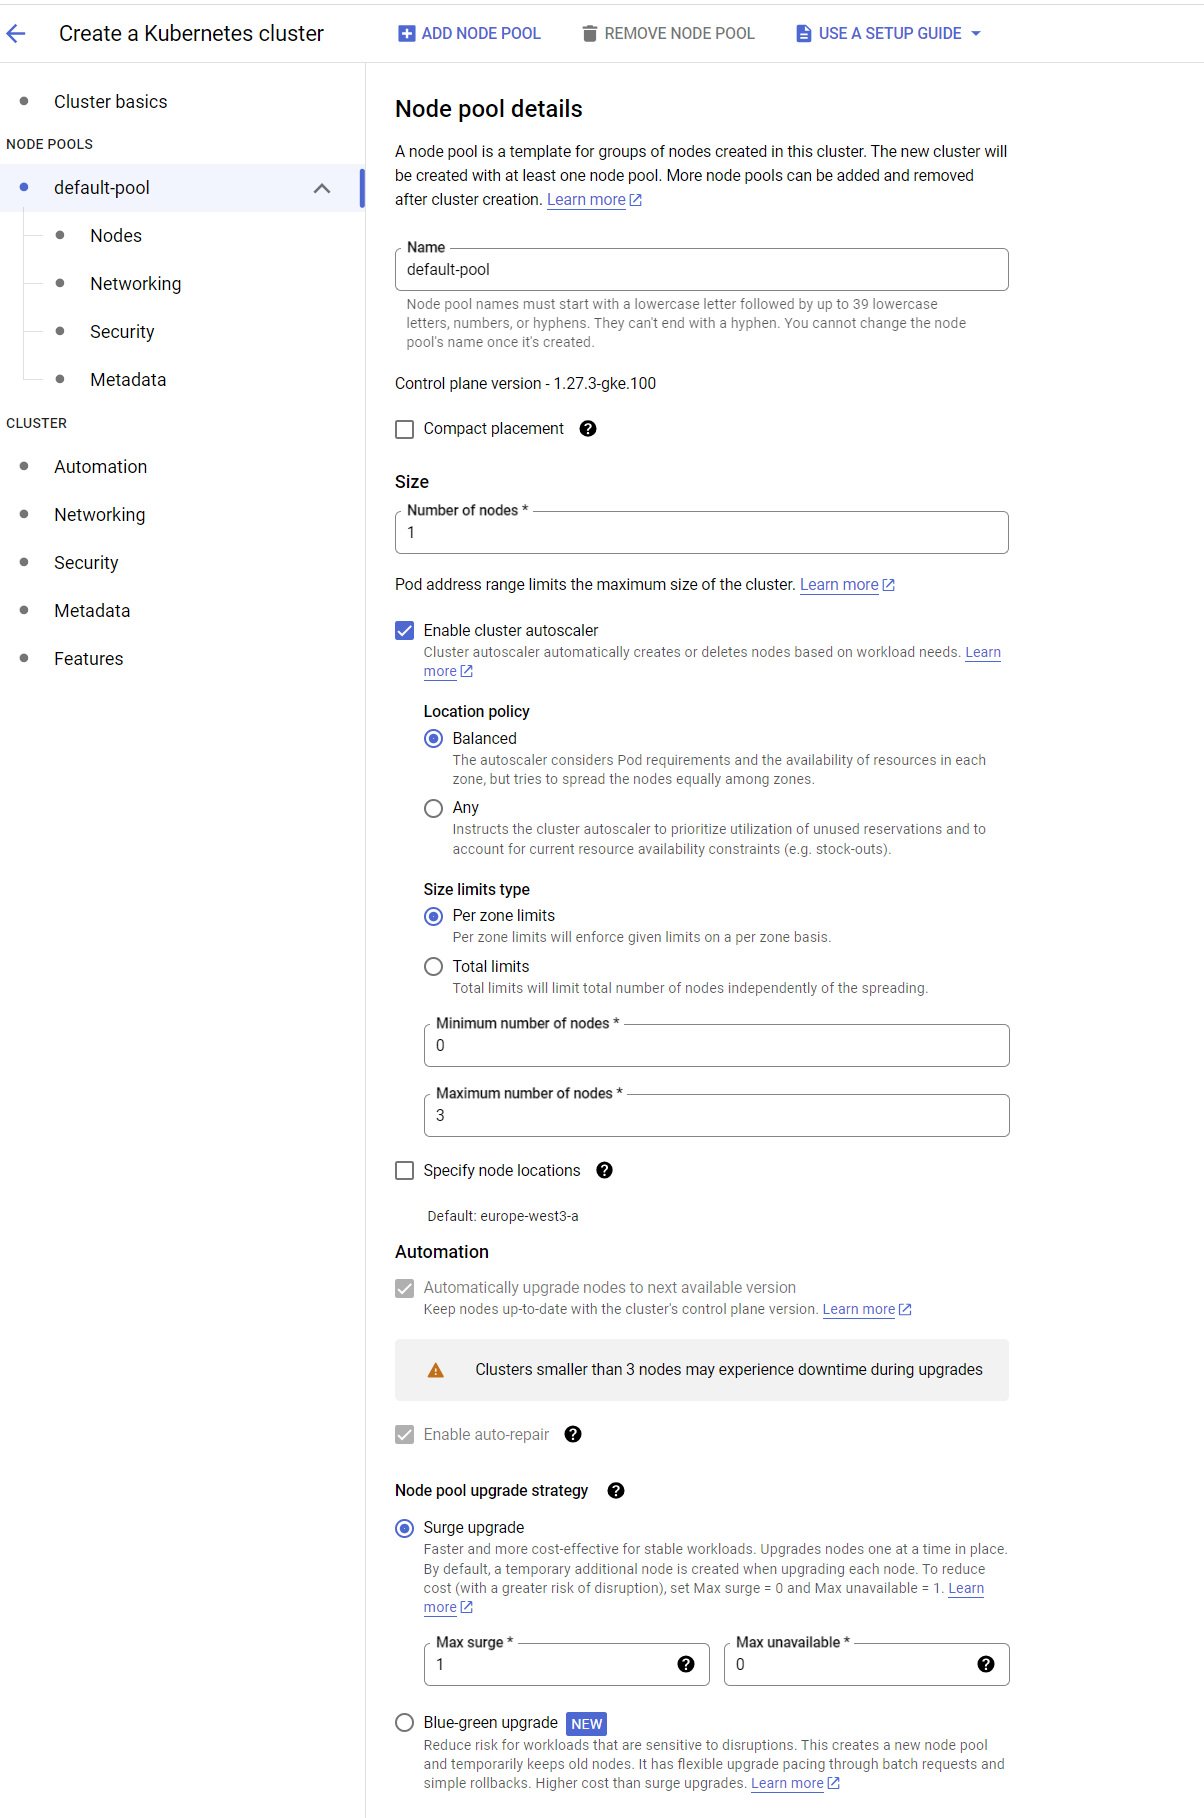
Step3: Deploy via Helm Chart
- Add the helm repo by running below command.
helm repo add repo-helm-charts https://nfdi4chem.github.io/repo-helm-charts/- Run the below command to deploy the CM app.
helm install myrelease repo-helm-charts/cheminformatics-microserviceThe release name (myrelease in this example) is used to identify the deployment, and it must be unique within the Kubernetes cluster. The above command with deploy the service with the default configuration provided in values.yml file. To overwrite the default configuration please follow this link to learn more.
- Helm will install the chart and deploy the application to your Kubernetes Cluster. To see the progress click on
Workloads&Servicestab. or run below commands in your Cloud Shell.
kubectl get pods
kubectl get services- Once all services are deployed you can see green check next to each services. If not then check the logs to learn more.
- To access your service you may have to expose it either by setting the type to
Load Balancerunder service in values.yml file or by an Ingress depending upon your requirement. To learn more about how to configure Nginx Ingress you can click on the link here.
Step4: Clean up
To avoid incurring charges to your Google Cloud account for the resources used in this tutorial, either delete the project that contains the resources, or keep the project and delete resources by running below command.
helm delete myreleaseScaling
In case of performance issue, the CM application can be scaled automatically using different strategies. The Helm chart for CM comes packaged with Horizontal Pod Autoscaler. Horizontal Pod Autoscaler (HPA) is a Kubernetes feature that automatically adjusts the number of replica pods in a deployment or replica set based on observed CPU utilization or other select metrics. This allows your Kubernetes cluster to dynamically respond to changes in application load, ensuring optimal resource utilization and application availability. You can set the targetCPUUtilizationPercentage and targetMemoryUtilizationPercentage values in values.yml file according to your need and demand, which is the deciding factor to trigger the scaling. To learn more about different types of scaling in Kubernetes and GKE follow the official documentation of Google Cloud.
INFO
For Docker Compose based deployments follow the documentation here for scaling.
Contribute or Report an issue with CM Helm Chart
Thank you for your valuable assistance in enhancing our deployment process. If you would like to contribute, kindly create a pull request in our GitHub repository. For any issues or bugs you have encountered, please feel free to create an issue in the same or write to us at caffeine-devs@uni-jena.de. Your feedback is greatly appreciated.
References - https://cloud.google.com/docs